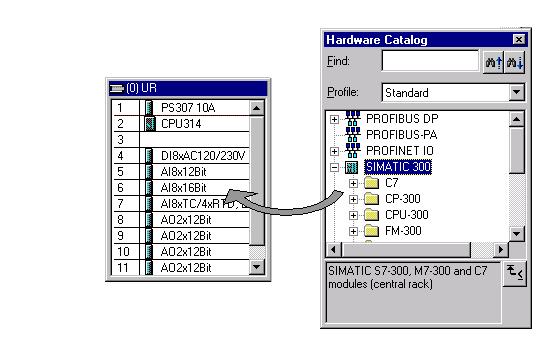
BasicProcedure for Hardware configuration
Basic Procedure for Configuring Hardware
Window
for Configuring
Configuring
a programmable controller involves the use of two windows:
• The station window in which you place the racks for the station structure
• The "Hardware Catalog" window from which you select the
required hardware components, for
example,
racks, modules, and interface submodules.
Displaying
the Hardware Catalog.
If the
"Hardware Catalog" window is not displayed, select the menu command View > Catalog.
This
command toggles the display of the Hardware Catalog on and off.
Basic Steps for Configuring a Station
Independent
of which structure a station has - you always configure using the following
steps:
1. Select
a hardware component in the "Hardware Catalog" window.
2. Copy
the selected component to the station window using drag & drop.
Layout of the Station Window
The lower
part of the station window shows a detailed view of the inserted/selected rack.
The order
numbers
and addresses of the modules are shown here in table form.
Representation of Modules in the Detailed View
The following
special features apply to the display of modules and submodules:
• If DP slaves were configured in "DPV0" interrupt mode, the
modules of these DP slaves have a
faded
appearance in the detailed view. The faded appearance indicates the modules do
not
provide
any diagnostic information.
• If the name of the module is shown in italics, this is integrated in
the central module and cannot


Comments
Post a Comment